
You might wonder why you need to know how to install snow guards on metal roof structures in the first place? Not only is it an important skill for all types of homeowners, but it can help prevent major damage from occurring to a building.
Once you understand the challenges of snow build-ups on residential roofs, you will know the importance of snow guards on your metal roof.
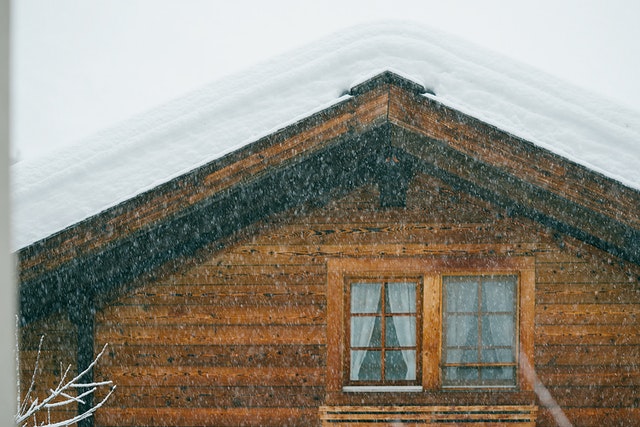
The most significant challenge is that snow produces sliding forces, and then the snow falls suddenly. You don’t want a miniature avalanche to form on your roof; thus, this creates the need for snow guards. It mitigates the hazards and potential damage that would come with the event.
When looking into how to install snow guards on a metal roof, it’s essential to know that it’s something you can turn into a DIY project. That being said, homeowners that aren’t comfortable can always call on a professional service, like our team at Roof Master.
Steps To Follow When Installing Snow Guards on Metal Roof
Installing snow guards on a metal roof is easier than you would think. The secret to succeeding at it is following the various steps. The pitch of your roof is the primary factor that guides your installations.
Let’s look at how to install snow guard on metal roof structures in detail.
Step 1: Ensure You Have the Appropriate Equipment
Using the proper equipment when installing snow guards on the roof ensures your safety. For instance, you must have a sturdy ladder and an assistant to help you watch your steps when ascending and descending.
When using a ladder, wearing the right shoes is also essential to prevent slipping. In addition to using the right equipment, consider working at a time when the weather is dry. Working when it’s snowy and icy makes working on the roof hazardous.
You should always try to carry up all the tools you will need to the roof in an efficient and safe manner (instead of carrying them all at once in your hands). For instance, you can have a bucket tied to a rope to ascend with it as you climb the ladder. The rope helps you haul the tools up after climbing.
Step 2: Understand Your Roof Type
After ascending your ladder, the next thing you have to do is measure the width of the roof panels. Typically, the standard width for roof panels is 16 inches and 24 inches. Getting the width measurements for the roof is essential to help you plan the snow guard installation.
For 16-inch wide panels, you will install the snow guard at the center of each panel, while the 24 inches wide one takes two snow guards on each panel. Ensure that you space the snow guards 12 inches apart.
Step 3: Know the Pitch of Your Roof
Getting the accurate measurements of your roof’s pitch is part of learning how to install snow guards for metal roofs. Pitch is the inches the roof slopes downward for every horizontal foot it travels, usually expressed as a ratio.
You first have to find the roof’s rise to get the pitch. The rise is the vertical distance between your roof’s highest and lowest points. Proceed to get measurements straight down from the highest point at the peak to get it
Next, find the horizontal distance from the roof’s edge to the peak, run by measuring a straight line along the side of the house from the edge until the centerline. Represent pitch as the number of inches per 12 inches of Run.
If the rise is 80 inches and the Run is 240 inches, the pitch becomes 4/12. So, your roof slopes 4 inches every 12 inches of the Run downwards. Usually, steep roofs demand that snow guards get installed close together, and vice versa for shallow roofs.
Step 4: Plan the Snow Guard Rows Installation
Typically, snow guard installation is in rows starting 1 foot from the roof’s lowest edge. Follow that pattern moving higher up the roof until you get to the midpoint of the slope. The rules for installation at this point depend on the roof pitch.
For instance, a 0.5/12-2/12 pitch requires rows of snow guards installed 15 feet apart, 3/12-4/12 pitch takes rows installed 10 feet apart, 5/12-6/12 pitch takes rows 8 feet apart, and 7/12-12/12 takes rows installed 5 feet apart.
Placing snow guards too far apart on a steep path makes them weak and unable to withstand large amounts of snow build up. Also, placing them too close together on a shallow roof wastes resources and time.
Step 5: Stagger the Snow Guards
Staggering the snow guards involves moving left to right while marking the first guard’s position 1 foot from the roof’s edge. After that, the second guard is 2 feet from the roof’s edge. Continue with the pattern for the third and fourth guard.
The goal is to mirror the pattern in the subsequent rows to ensure more control over the snow. Keep in mind that the rows of snow guards need to be at the midpoint of the roof slope and not higher.
Step 6: Clean the Metal Roof Surface
Cleaning the metal roof surface ensures that the guards form a good seal. It’s an essential step, especially when using an adhesive. Consider following the manufacturer’s instructions if need be.
Step 7: Install the Snow Guards
The final step is the installation which the manufacturer can guide you through it. You might need adhesives, screws, and clamps for this part. After the installation, give it a few days for the adhesive to cure.
Installation is a straightforward process once you have sorted the pitch and planning part. Warm weather plays a role in making this possible if you weren’t using screw-on snow guards.
Conclusion
Planning is an essential detail to master in installing snow guards on a metal roof. Ensure you have all the tools and materials you will need nearby to ensure that you don’t go back and forth on the roof. You will be happy with the results after following all the steps above.
As a reminder, if you have questions about any aspect of your roof, don’t hesitate to contact our team of roofing pros at Roof Master.
