
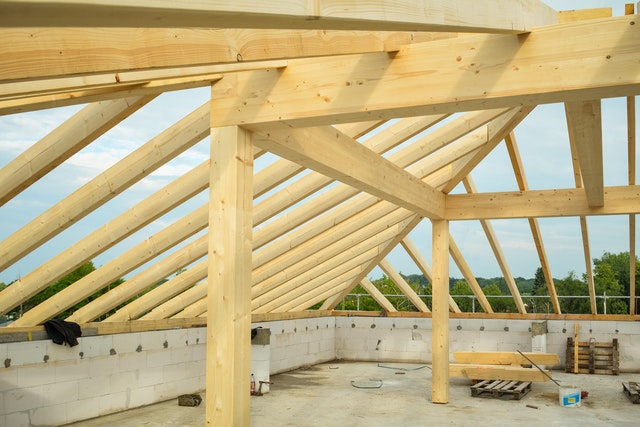
Installing trusses or rafters on your roof ensures that you have a sturdy roof. A broken roof truss can lead to various structural problems. The worst thing you can look forward to when you have a broken roof truss or damaged rafters is the collapse of your roof.
It’s not always necessary to involve professional services since, for instance, you can learn how to repair mobile home roof trusses yourself. But for a traditional home, you need the right tools, assistance, and a detailed list of instructions.
How To Repair A Broken Roof Truss
You may not always have access to a roofing expert. It’s only prudent that you learn to take care of your home. So if you are ready to learn how to repair a broken roof truss, follow this step-by-step list of instructions as your guide.
Step 1: Assess the Issue
Assessing the situation may take you to the attic, where it’s cramped and tight. Having light as you go up there could help matters. You have to be careful with your steps. It is easy to fall through the rafters (which are typically spaced 24 inches apart).
Ensure that you spot the right parts to step on to avoid putting pressure on points that may not be strong enough to support your weight. The goal is to avoid causing your roof to collapse.
You can place 2-by-8 boards across the rafter. That way, you create a temporary stable surface to move on.
Additionally, you need to keep an eye out for rotted trusses. Be sure to reach out to a professional service, like Roof Master, if you don’t feel comfortable or know how to repair a rotted roof truss or other similar issues.
Step 2: Get the Measure of the Roof Truss
The next thing you have to do is determine the size of the broken truss. The typical length for lumber meant for trusses is either 2 by 6 or 2 by 8.
Get the measurements of the truss by measuring across it. If it’s a 2-by-6 truss, it will measure 5.5 inches and 7.5 inches if it’s a 2-by-8 truss.
Step 3: Cut the Pieces You Will Need in the Repairs
Proceed to cut the lumber 4 feet long to repair the first phase. The pieces you cut in this style will become patches. You’ll install them to support the broken roof truss on each side.
Step 4: Attach the Truss Patches
Start attaching the patches. Position the 4-foot board on the flat side of the broken truss. Place the same amount of patch on either side of the break. You can do this by ensuring that the gap is centered right in the middle of the patch.
After that, you can secure them using screws on one side. It is where you will need your assistant to apply pressure to ensure that the truss aligns. Repeat that process for the other patch.
Step 5: Apply the Second Patch
The final step on how to repair a broken roof truss is simple. You can begin work on the second patch on the other flat side of the broken truss. Position it in line with the first patch and secure it using screws.
Those repairs should help fortify the truss again. Wear goggles and gloves when driving the screws into the wood.
It’s not uncommon to find a broken truss accompanied by broken rafters. Some things will tell you to need to replace a rafter as well.
Replacing the Rafters
It’s not enough to learn how to repair a rotted roof truss. An important lesson when looking into how to repair a roof truss is learning about replacing rafters. Replacing rafters is just as easy as reaping trusses.
It’s typical for rafters to wear out and crack, so replacements are inevitable. You can do so without removing the roof. It’s better when you have learned a few carpentry skills and have the right tools for the job.
Step 1: Get the Dimensions of the Rafters Under the Roof
Start by measuring the old rafters under the roof surface using a tape measure. Have a book and pencil or pen at hand to record the distance of the rafter’s legs. Using the dimensions you just extracted from the old rafters, you will need a circular saw to curve our new rafters from wood.
You have to do the same for the joist beneath the old roof rafters. Ensure that you don’t cause damage to the roof in the process of measuring.
Step 2: Position the New Rafter Legs Next To the Old Rafters
Place the new rafter legs next to the old rafter and use a hammer and nails to fasten the new rafter to the old one. Also, ensure that you attach the rafter to the ridge beam using nails.
Do the same for the other side of the old rafter. Do so to leave the old rafter lying between two new pieces. Repeat the process for the second rafter leg.
Step 3: Position New Joists under Each Set of the New Rafters
Place the newly cut joist beneath the new rafters while noting the slow on the new joist using a pencil. Use a circular saw to cut the joists at the ends and the pencil marks. The goal is to ensure that the joist fits nicely under the rafters.
Step 4: Nail the Joists
Secure the joists at each end of the new rafters using nails. You should have accomplished your goal of positioning the new rafters to relive lead from the old ones by this point. That way, you are assured that the roof does not collapse.
Bottom Line
It’s essential to get ahead of roof problems before they become too serious. You can check for the signs of issues with your roof to know when to take action. Some issues are visible while looking for cues like a sagging roof tells that your roof needs attention.
Repairing roof trusses and replacing rafters requires you to know how to use the various tools involved and how to measure. Ensure that you learn some carpentry skills and prepare to take on roofing work. That is when you want to DIY, which may be risky.
