It’s important to know how to mount solar panels on a roof if you wish to engage in a rooftop solar panel installation project soon. Solar panel installation is an easy process that can be done in just about any climate — but you must do it right.
If you’re just getting started with rooftop solar panel installation, you’re going to need a few effective installation steps to guide you through. We’ll go over how to mount solar panels on the roof and all of the tools you need for this project.
How to Mount Solar Panels On Roof: What You Need
Once you’ve made up your mind to install a solar panel on your rooftop, the first thing you’d want to do is gather all the necessary tools. The essential tools to include in your list are:
- The solar panel kit and accessories
- Ladder
- Measuring tape
- Battery-operated drill with bits and screws
- Leveler or bubble level
- Hacksaw
- Screwdriver
- Tape measure
- Aluminum cement
Mounting Your Solar Panels on a Roof
You’ll need an assistant to hold the ladder and pass tools as needed, so make sure that person is present before setting out.
Step 1: Clean the Roof
When mounting solar panels on your roof, the first thing you want to do is clean the roof, especially if it hasn’t been done in a while. Cleaning your rooftop will help you better see any obstacles that need moving before mounting the solar panels on top of them.
You should concentrate your cleaning on the favorable spot where the solar panel will be going. The best spots on your roof are always on the west or east sides, where most of the sunshine passes through.
Step 2: Figure Out Where the Stanchions Will Go
Once you have the roof clean, it’s time to figure out where your stanchions will go. Many people make this part more difficult than it needs to be, but you’ll be able to get through this with a little patience.
You’ll need a tape measure, a level, and a pencil or marker for this step. To find the most favorable spot to put your stanchions, you’ll want to take into consideration how much sunlight passes through in each season.
Step 3: Fix the Stanchions in the Marked Spots
Now that you have your stanchions in the right spot, it’s time to fix them. For this step, you’ll need some screws and a screwdriver.
Ensure not to install them too tightly, or else they will be difficult to remove later on when you want access underneath for wiring. You don’t want loose screws either because that will lead to rust and corrosion.
Step 4: Bring On the Flashing
This step is crucial. The flashing prevents water from getting inside the house and causing damage to your home’s interior. To install it, you’ll need a bit of self-leveling sealant and some aluminum cement (the type that turns white when mixed).
First, put down a layer of self-leveling sealant on top of the mounting hardware. Then, attach a piece of flashing to this sealant and push it in place tightly against the roof’s surface. Use aluminum cement on top of that before adding another layer of self-leveling sealant.
Finally, add some more flashing at any spots where there are gaps between your shingles or your roof and the flashing.
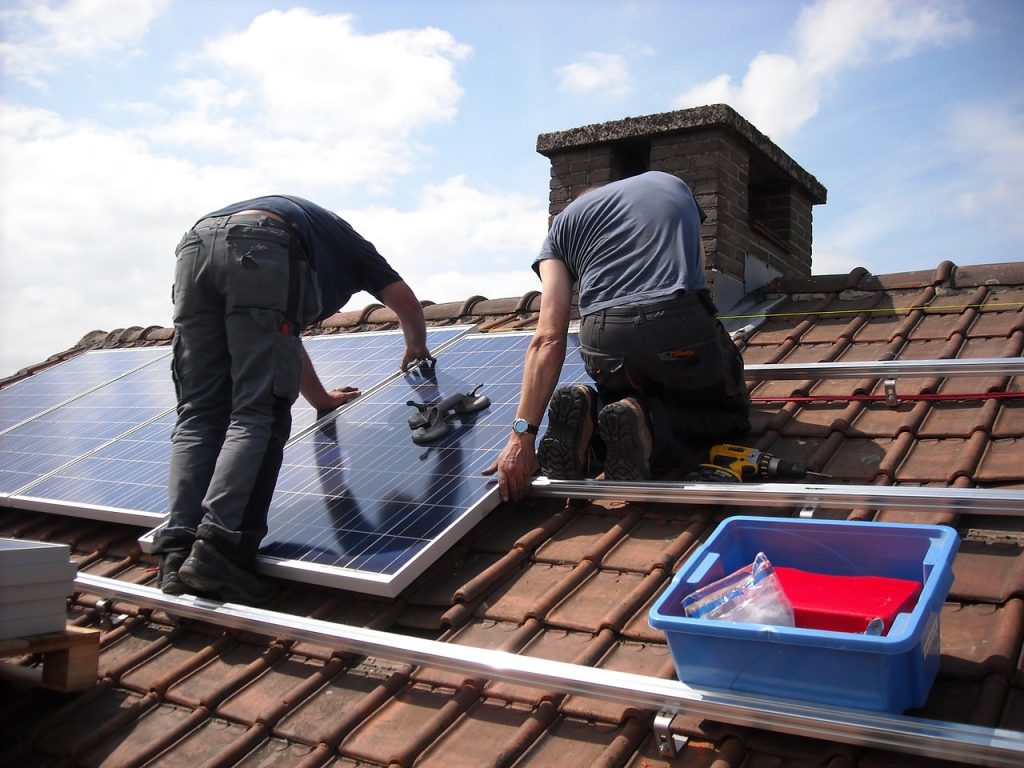
Step 5: Fix the Rails in Place
Once you’ve finished installing the mounting hardware, it’s time to fix the rails in place. Begin by setting them on top of your roof and lining up their holes with yours. Then, use screws or nails to secure each rail before adding self-leveling sealant over all parts that aren’t already covered up by flashing.
Remember that rails are crucial in holding the panels firmly in place, so make sure you fasten the rails firmly and ensure that they’re flush with the rest of your roof. Also, make sure the diagonal distance between the rails is equal to avoid problems when fixing the panels.
Step 6: Time to Fix the Wiring
Once you have the rails firmly in place, it’s time to fix the wiring. This is when to bring in the power inverter kit under each panel and fix the corresponding wires running along the rails beneath the panels. At this stage, you will determine whether you’re going for a parallel or series connection, so be sure to have a clear idea of which you want.
For a Parallel Wiring
Ensure all the positive leads from each panel are coming together and are connected with a wire shorter than those running down along the rails to your power inverter kit. The same applies to negative connections, too; all panels’ negatives should come together and be connected with the longest wire to your power inverter kit.
For a Series Wiring
Join each panel’s negative first with another cable length, then run down the wires along the rails like in parallel connections. The positives are next; they need to go through one end of an electric diode (a small solar-panel diode) and then down along the rails.
In a parallel connection, you need to mount your panels on a metal roof to shade each other. If one panel is shaded too much by another, it will produce less power which means you’ll need more panels to make up for it.
If you want a particularly efficient system, maintain the asymmetrical positioning of all your solar panels on the roof.
Step 7: Mount Your Panels and Connect Them to the Inverter
The final step is to mount your panels and connect them to the central inverter and power system. You’ll need to connect your panel’s positive and negative cables (red and black for DC or red, green, and brown for AC) into the input terminals on the inverter. Once you’ve done that, it should start turning sunlight into electricity promptly.
You can also use a meter to test how much power the individual panels are producing. You can then use a simple calculation to figure out how much power you generate and use throughout the day.
How To Mount Solar Panels On Metal Roof
If you are fortunate to have a metal roof on your home, you can still install solar panels without struggle. All you have to do is get the solar panel mounting systems that clamp on your roof’s metal standing seams.
What if your house has a metallic corrugated rooftop?
In that case, you will have to use different mounting systems. For instance, you will need special brackets that will attach to the roof panel’s top crests and leave the low-lying grooves for drainage. The shape and pattern of the metal roof play a vital role.
Work with Professional Solar Panel Installers
At Roof Master, we don’t just install solar panels; we also do the design work and provide you with all necessary equipment. We have solid experience in this industry, so rest assured that our team knows how to get your system set up correctly.
Contact us now if you have any further questions or would like to set up a consultation.


