
A lot goes into a standing seam metal roof installation. As the most popular metal roofing style in residential and commercial properties, standing seams may require professional intervention. However, you can opt for DIY installation if you have all the essential tools.
A properly installed standing-seam roof can improve your home’s curb appeal and also help you save money when you opt for DIY installation. Thankfully, this guide explores the basic steps of installing standing seam roofs and the essential tools and materials.
But before we go through the steps of metal roof installation, it’s crucial to understand the distinctive features of standing seam metal roofs. That’s because many people tend to confuse standing seam metal roofing with other metal roof designs.
That said, let’s get started!
What Are Standing Seam Metal Roofs
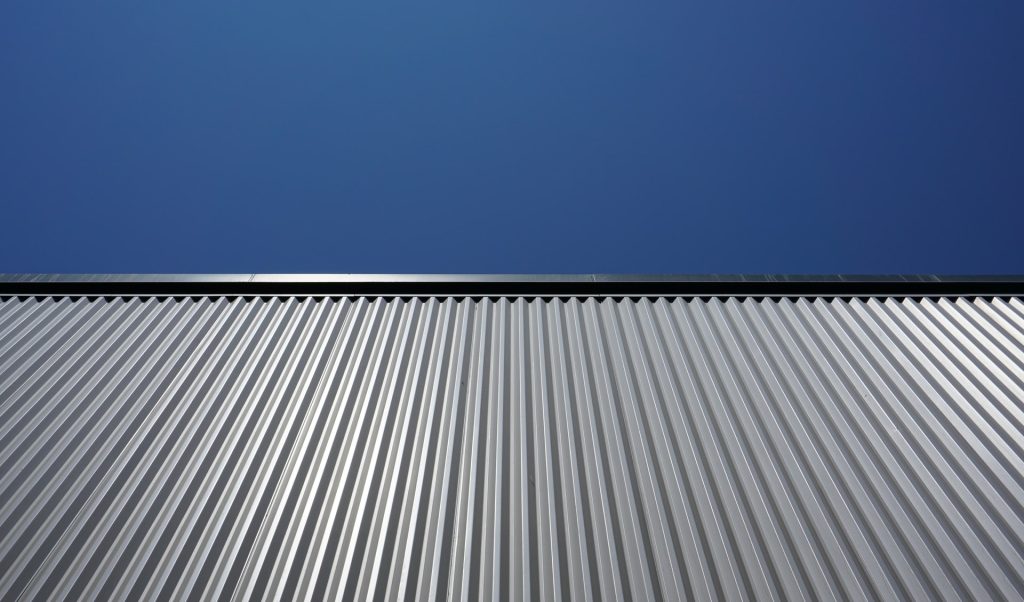
Standing seam metal roof panels consist of raised seams (or standings) that act as barriers to prevent rainwater infiltration. You can also install roof fasteners on the seams during installation. However, the fasteners are usually hidden, unlike in other roofing systems.
Notably, standing seam metal roofs are more popular on residential properties but can also get installed on commercial buildings. The good thing about these roofs is that they have smooth surfaces, allowing water to drain quickly, even on low-pitched buildings.
A Step-by-Step Guide for Standing Seam Metal Roof Installation
Now that you know what standing seam metal roofs are, it’s essential to understand the installation basics. First, you must prepare the roof deck properly before installing the metal roof seams. Also, the wooden substrate below the roof should be dry and even.
Another thing not to forget is the underlayment, which can be a synthetic underlayment or roofing felt. If you opt for synthetic underlayment, it should be breathable so as to not trap moisture. Otherwise, the roof deck may rot or grow mold.
Here are the steps to follow during standing seam roof installation.
Step 1: Assemble All the Required Tools and Materials
If you plan to install a standing seam roof by yourself, you’ll need specific tools and materials to do the job properly. Here are the things you must prepare for the work.
Essential Tools
- Fastener drivers
- Hacksaw
- Metal shears
- Pitch gauge
- Roofing shovel or pry bar
- Drill with a metal cutting wheel
Essential Materials
- Flashing
- Gutters and drip edges
- Ladder or scaffolding
- Metal sheet panels
- Metal roofing nails or fasteners
- Ridge caps
- Safety harness
- Underlayment
Pro Tip: If you don’t have all the necessary tools and materials, it can be tricky to install the roofing by yourself. So, consider hiring an expert roofer to help you get the job done.
Step 2: Take the Roof Measurements
Before buying the metal roof panels for your roof, you must take the roof measurements to ensure that they fit your roof. To get the correct measurements, you need to get to the rooftop using a ladder. Don’t forget to put on the necessary safety equipment.
The parameters to measure are the roof’s pitch, height, and length. In other words, you must measure all the gables, ridges, eaves, and valleys on the roof. That will help you calculate the correct number of metal roofing panels to cover your entire rooftop.
Consider buying pre-cut metal panels as they can give you the correct estimations. Also, if your roof is steep, you’ll need more metal roof panels. Finally, as you estimate the number of metal roofing panels required, don’t forget to include the waste.
Step 3: Remove the Old Roofing Material
If you are re-roofing your house, consider removing old roofing material before installing the new one. All you should do is remove the nails or screws and pull up the roofing material. However, if the roof has a standing seam design, you may need to cut some panels.
Tear off the old roofing panels or shingles in sections while dumping the waste shingles in a dump trailer. In this case, you’ll need another person or crew to do the job. Once you do that, repair all the structural damages that might have resulted from the process.
Step 4: Install the Drip Edges and Lock Strips
Install a new frame on the roof, then follow it with drip edges to cover all the seams between the roofing panels. The drip edges can stop water from seeping through the gaps on the roofing material. As a result, no water will drip down onto your walls.
Once you do that, install lock strips at the eaves and rakes of your roof. The lock strips hold the standing seam metal panels to the roof edges, preventing them from flapping during strong winds or storms. Their lock strips’ color should resemble the roofs.
Step 5: Install the Standing Seam Metal Panels
Right now, your roof is ready for the standing seam metal roof panels. So, before installing the panels, cut off their bottom at the ribs (standing seams) to ensure they lock to the lock strips. Most ribs on metal roof panels are usually 12 – 24 inches apart.
After cutting the standing seam of the first roof panel and locking it to the lock strips, attach the other metal panels using clips (fasteners) at the ribs. Don’t forget to install the clips on the ribs pointing upwards. Do the same for all the roofing panels.
Step 6: Install the Ridge Caps and Gutters
Finish the installation process by adding ridge caps and gutters. The ridge caps will prevent water from seeping into the roof through the roof’s uppermost edge. As a result, the ridge caps will protect your property from possible water damage.
Gutters can protect your house’s foundation from direct runoff of rainwater and give your roof clean lines by covering all the seams or edges. Once you install the ridge caps, the metal panels will get locked in entirely, and you’ll have a new standing seam metal roof.
Final Words
Installing a metal roof system can be challenging if you don’t know where to start. Thankfully, this standing seam metal roof installation guide has covered all the steps to help you handle the project by yourself. However, you can still hire a professional roofer at Roof Master & Construction to help you install panels if you lack the required skills.
Contact us today and speak to our expert roofers for professional advice and guidance.
