
One of the common causes of leak leaks is a faulty working roof jack. Leaving it damaged exposes your house to water damage on the roof’s inner parts and walls.
If your roof jack is completely damaged, you can replace it with a homemade one or buy one from the store. Learning how to install a roof jack vent properly is quite straightforward, though you will need a ladder to climb up the roof during installation, loosen the shingles, and install the vent. Although the process sounds easy, it’s best left to professional roofing experts.
Before looking at the simple steps of roof jack installation, you first need to identify if it’s leaking and needs a replacement. You also need to take the correct safety measures when climbing the ladder or walking on the shingles.
What Is A Roof Jack Vent?
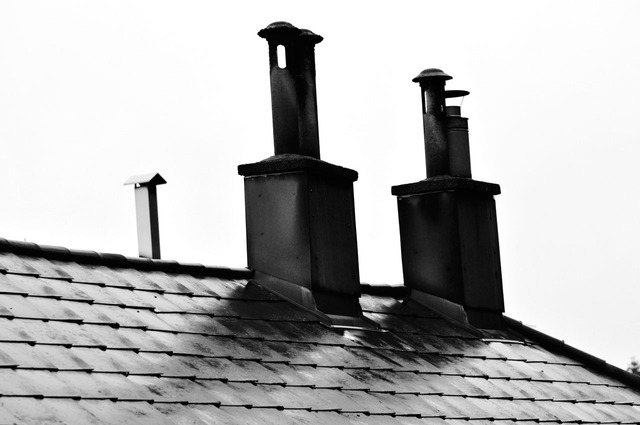
A roof jack vent prevents rainwater from leaking into the shingles and stops the entry of snow and debris through the attic ventilation. When making a purchase, you can purchase durable materials like steel to prevent rusting and ensure the longevity of the vent.
It will cost you about $300 to $650 to install the roof vent, including the material and the installation fee. However, the prices vary with the sizes and types of the vent. Also, the number of roof jacks you need depends on the roof size and steepness.
For example, if your roof is inclined to 45 degrees, two or three jacks will be enough. The steeper the roof, the more roof jack vents you will install, since they can help to improve air circulation and balance on the roof.
Homeowners should conduct roof inspections to check if the roof jacks are correctly working. During the examination, the roofer might notice a lot of tar around the jack or some cracked parts that need fixing.
The other common problem with roof jacks can happen with the bottom part of the metal flashing. It can become exposed after strong winds or when a tree branch falls on the roof jack; these openings can allow water into the shingles and can cause significant damage.
How to Spot a Failing Roof Jack Vent
Before your roofer notices the particular issue with the roof vent during the inspection, you might spot some signs on your own. However, you shouldn’t conclude that the problem is the roof jack vent without confirmation from the installer. Some signs of a failing roof vent are:
- Deteriorating Roof
When the vents bend and leave some space on the sheets or shingles, water can enter the roof’s inner parts through the shingles. Rafters, seams, and other wooden parts soak in the water and might start swelling and rotting.
Water can also cause cracking of the shingles and rusting of the iron sheets. Although there are many causes of deteriorating roofing materials, a failing roof vet is a significant cause. Inspecting the roof will help you rule out the problem.
- Less Air Conditioning
You can know that your home has a problem with the conditioner if there is less air circulation and increased energy bills. When it is too cold or hot, and there is no temperature regulation, you need the HVAC system to cool the home and the system uses a lot of energy hence the higher bills.
Damaged roof vents can also cause deterioration of the air conditioner. If there are uneven temperatures in the rooms, it is a sign of a damaged conditioner, and the reason could be the roof vents.
- Pests
A damaged roof vent will be an entry point to pests like bugs, squirrels and rodents. These can increase the damage to your vents and spaces within your roof, and they can also cause allergies and infections to your family.
- Mold in the Attic
The roof vents help to regulate the temperatures in the attic. If they have issues, moisture could enter the attic and cause mold. The mildew can cause allergies and increase the likelihood of asthma attacks.
Mold can also attack other parts of the house, and if they get to the furniture and curtains, or walls, they can cause permanent damage. Replacing the roof vent will help to control this problem.
Roof Jack Vent Installation
Now that you know the importance of a roof jack vent and the signs that it needs replacement, you can follow these steps to ensure proper installation. The installation process is straightforward, but we recommend contacting a qualified installer like Roof Master to ensure a quality installation.
Step 1: Climb up The Roof
The first step to installing a roof jack vent is climbing up the roof. Get a sturdy ladder and suitable climbing attire. Ensure your shoes provide an excellent grip to avoid slipping and falling, and wear a helmet. It protects your head from severe injuries if an accident happens.
Step 2: Loosen the Shingles
Once you get to the rooftop, loosen the shingles on the sides and the top of the current jack vent. It allows you to easily remove the vent, repair any damages around and install the new one.
You can easily remove the shingles by sliding a knife underneath them and lifting them. Ensure you also remove the roofing nails fixed under the shingles. While on the roof, do not step on the shingles because they can break, resulting in roof leaks.
Step 3: Install the Flashing
You’re almost done getting your new jack vent on the roof. Once the shingles around the old vent are loose enough, lift the current jack and remove it. Be careful of the nails under the vent flap, which can potentially cause injuries.
When the old jack comes off, slide the new one above the plumbing vent and fix it under the shingles. Use nails on every corner of the duct to fix it and ensure it is sturdy. You should then put the shingles back and caulk around the area to seal it completely.
Final Words
Now you know the steps on how to install a roof jack vent. Still, to ensure your house does not suffer from secondary issues and so the vent works effectively, hire roofing professionals to inspect your shingles and the vents and perform the installation for you; it can save you a lot of headache and hassle down the line.
